The Pro-Approved Guide for a DIY Blow-Dry

Don’t worry, achieving a salon-worthy blow-dry from the comforts of your own bathroom is much easier than you remember.
Over the past year, we’ve championed tasks we never thought we’d have to conquer. From menial ones like learning how to churn out sourdough loaves and banana bread to the more advanced challenges of working from home, figuring out homeschooling, or learning to live an isolated, albeit more cozy, life from our own personal shelters.
In this time, we’ve picked up a few skills, learned to practice patience, and embraced a new version of ourselves. Just around the bend, full social calendars, summer holidays, and date nights are in sight, and with that comes the chance to emerge with a brand new style. For some, it might be like riding a bike again. Yet for others, who are dusting off blow dryers and fishing out round brushes from the depths of drawers, a refresher is desperately needed. Arming you with expert secrets and innovative styling products to ease the transition, we’re detailing a few of our top tips for achieving an effortless at-home blowout.
Prep makes perfect
Ask any pro and they’ll tell you that the perfect style starts in the shower with a deep cleanse and a great condition. If you’ve noticed a lack of volume or excessive buildup, start by giving yourself a scalp treatment with SCALP.SPA. Prior to cleansing, this two-part system will get rid of product buildup, slough off flakes, and prep the hair and scalp for the next steps.
Next, apply a WASH and RINSE that is tailored to your hair needs as well as the finish you’re looking for. Whether that is refreshing hair colour with BLONDE.ANGEL.WASH or adding volume with PLUMPING.WASH and RINSE. If you’re not sure what you’re looking for, take our PRODUCT MATCHMAKER quiz for quick and easy product suggestions just for you.
Prime & Extend Your Style
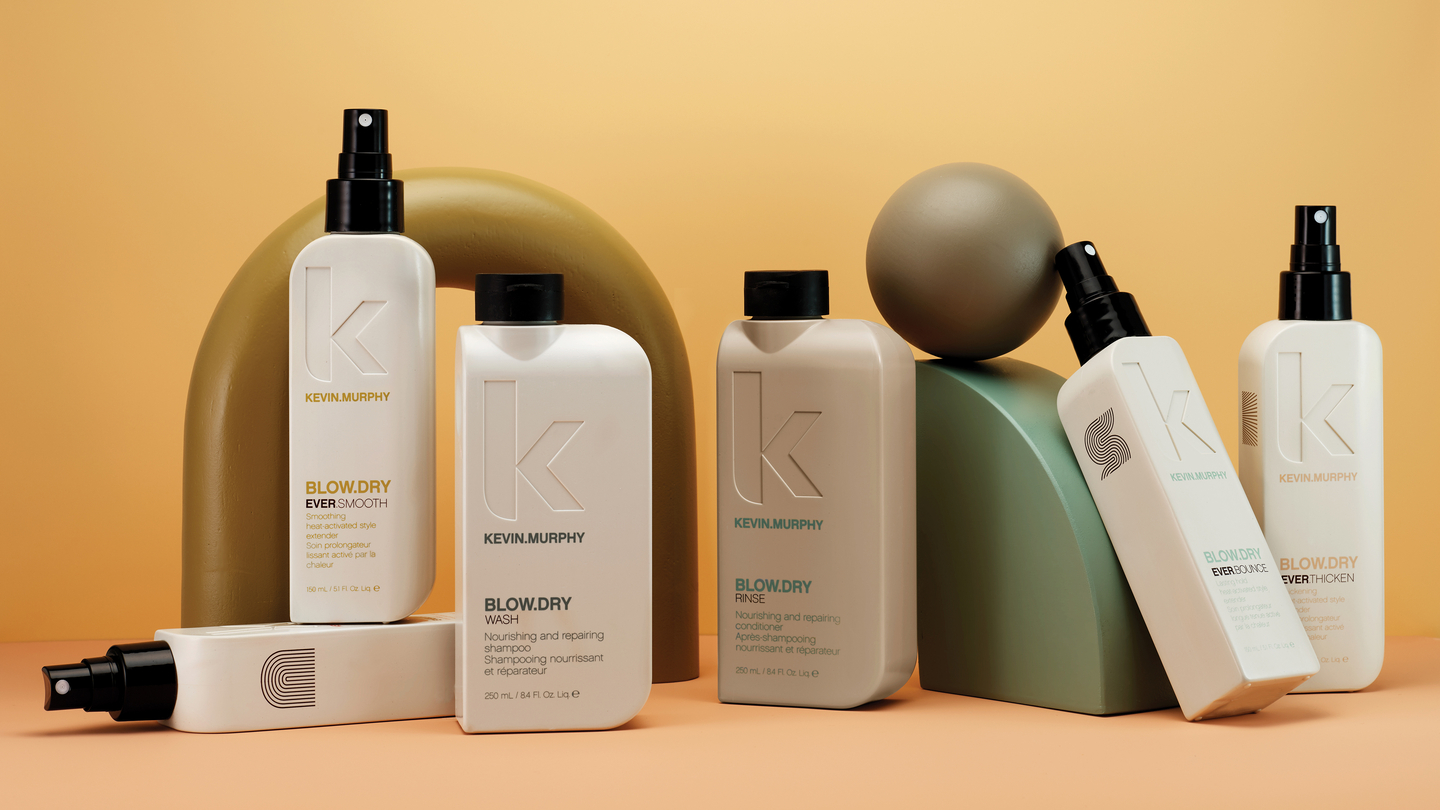
We all know the time and energy that goes into creating a salon-worthy blow-dry. Sections, stylers, and clips are just the beginning as you morph your body into a pretzel to reach all angles and finish each section with body and bounce. To cut down on time spent fussing while also extending the life of your blow-dry, prime your hair with the latest from the KEVIN.MURPHY BLOW.DRY range — your arms will thank you later.
BLOW.DRY: Take Your Pick
There are four unique stylers within the BLOW.DRY range — EVER.SMOOTH, EVER.BOUNCE, EVER.LIFT and EVER.THICKEN. All activated by heat, each one contains innovative ingredients chosen to cut down drying time while also extending the life, and enhancing the shape, of your blow-dry.
Adding EVER.SMOOTH to your routine will lead to supremely smooth strands while enhancing shape and allowing you to create a finished look with tons of movement sans frizz. If your strands are feeling parched, adding this product will help create the moisture needed for a perfect finish.

The Steps:
- WASH with SMOOTH.AGAIN.WASH + RINSE or YOUNG.AGAIN.WASH + RINSE.
- Gently towel-dry and spray EVER.SMOOTH throughout the hair and comb through.
- Taking diagonal or chevron sections, start at the nape and work a round brush through each section until completely dry. Continue to dry section by section.
Whether adding curl with a brush, a smooth finish, or a slight bend, you’ll notice a smoother, shinier finish and notice the results for the next few days.
Your go-to to create lush movement and just the right amount of curl that will sway with each step.

The Steps:
- WASH with PLUMPING.WASH + RINSE, towel dry and then spray hair with EVER.BOUNCE throughout.
- For this look, begin in the front and using diagonal or brick-lay sections, move a round brush forward, and then away from the face to create volume while opening up the face.
- To ensure a bouncy finish, roll each finished section the same way you dried it — up and away from the face into a medium-sized pin curl — and then use SECTIONING.CLIPS to keep the shape as it cools.
- Repeat this process throughout and alternate curl patterns forward and back to create random movement.
- If your hair needs extra hold, run a large curling iron through these sections, pin curl them again and allow to sit.
- Once cool, merge these sections together by raking through with your hands or a TEXTURE.COMB. If necessary, use a curling iron to touch up sections or add in twist-curls where you see fit.
If you’re looking for volume and undone texture, EVER.LIFT will give you the foundation you need for both.

The Steps:
- WASH with ANGEL.WASH + RINSE and then apply EVER.LIFT to towel-dried hair.
- To achieve volume, section out the top crown section and begin drying at the side and nape area first.
- Use a twist-dry method with your ROLL.BRUSH as you dry. Slightly re-twist each section with your hand and leave it to cool.
- When drying the top crown section, be sure to lift hair as you dry to create volume at the scalp.
- Once the whole head is dry, use your fingers or a TEXTURE.COMB to break the twists apart for an undone finish.
We love pairing a thick, full hair look with twist-curls to create a signature style that outlasts humidity and promotes shine.

The Steps:
- WASH with PLUMPING.WASH + RINSE and towel dry, then apply EVER.THICKEN throughout and comb through.
- Section out the crown section and begin drying the nape area with a twist-dry technique, using a SMALL THERMAL ROUND BRUSH to twist each section as you dry, creating a ribbon effect.
- Continue to twist these sections and allow them to cool as you continue to dry the rest of the head.
- When you reach the mohawk and crown sections, start at the fringe area and move the hair forward and then twist back away from the face to create a beautiful face-framing bend.
- To increase movement, consider following your blow-dry with a curling iron to enhance the shape.
- Then, be sure hair is cool to lock in volume and use your fingers or a TEXTURE.COMB to rake through the twists and open them up for a thickened feel.


